Hello, friends! Today, I’m excited to share a lovely recipe that’s become a staple in our home: Easy Gluten Free Pita Bread, ready in under 30 minutes and completely yeast-free! I remember the first time I made these pitas for my kids. They were a bit skeptical at first—“Is it really gluten-free?”—but once they took a bite, the smiles on their faces said it all! We had a fun time stuffing them with all sorts of goodies—grilled veggies, chicken, and even some tasty dips. This recipe has quickly become our go-to for busy weeknights or when we want a fun, interactive meal!
The best part about this pita bread is how simple the ingredients are. You won’t need to search high and low for exotic items, and the whole family can get involved in the cooking process, making it a perfect way to bond. I can’t wait for you to try it and enjoy the joy it brings to your family meals!
Table of Contents
Why Make This Recipe
Why should you add this Easy Gluten Free Pita Bread to your weekly menu? Let me count the ways! First off, if you have a busy family like mine, you’ll love how quickly this recipe comes together—perfect for those rushed dinners before soccer practice or homework time. Plus, with no yeast required, you can skip the waiting game. Just mix, roll, and bake—how simple is that?
Another reason to try this recipe is its versatility. These pitas can be used in countless ways. You can fill them with your favorite proteins, load them with fresh veggies, or use them as a dipping vessel for some homemade hummus. And the kids will love getting creative with their fillings! Not to mention, it’s a great way to introduce healthy eating habits by allowing them to customize their meals. Trust me, once you give this recipe a try, you’ll wonder how you ever lived without it!
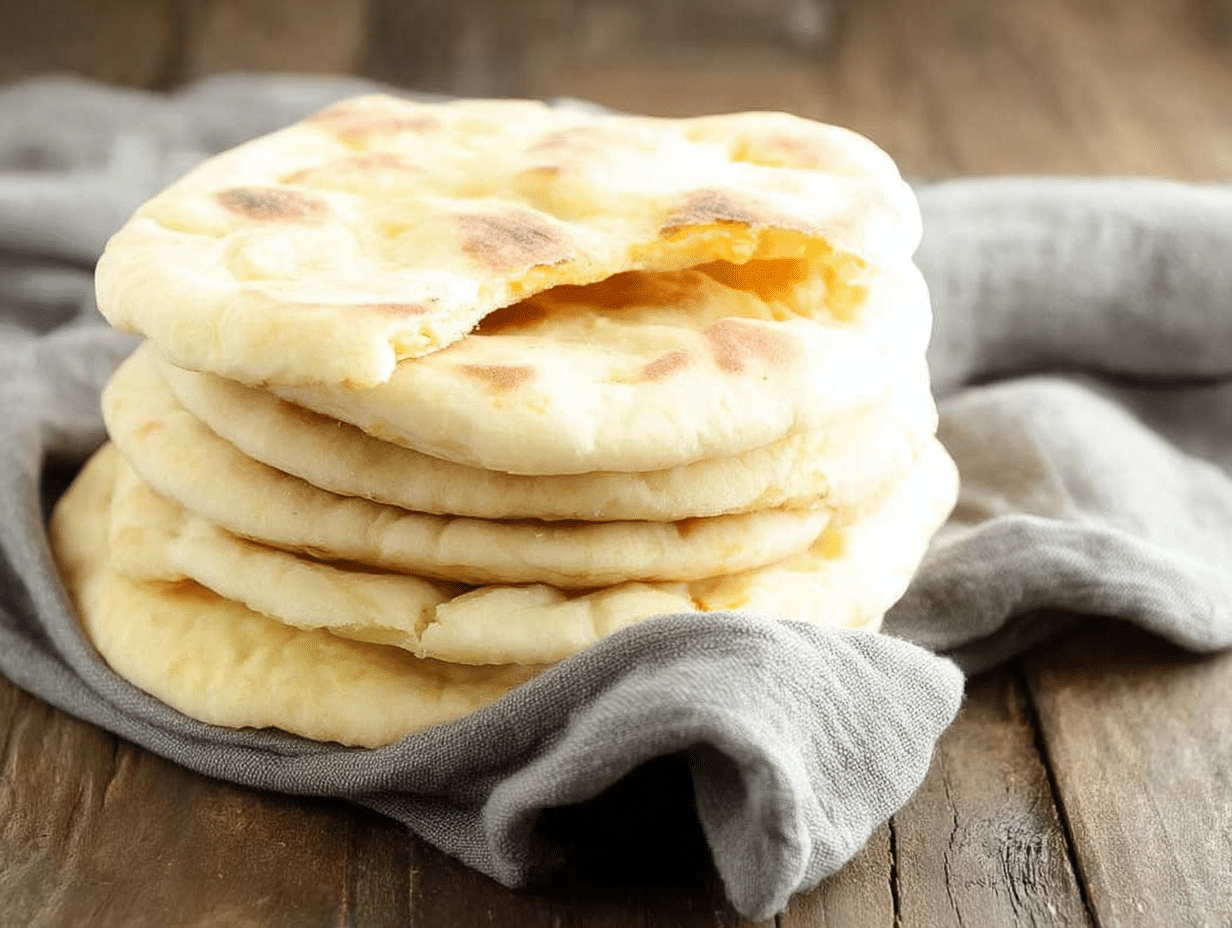
How to Make Easy Gluten Free Pita Bread | Ready in Under 30 Minutes
Let’s get started with making these delicious pitas! Follow my step-by-step instructions, and I promise you’ll feel like a baking pro in no time.
Step 1: Gather Your Ingredients
You’ll want to have all your ingredients ready before you start cooking. Healthy meal prep is half the battle!
- 1 3/4 cups all-purpose gluten-free flour blend
- 1 teaspoon xanthan gum (omit if your blend already contains it)
- 1/4 cup Expandex modified tapioca starch (See Recipe Notes for alternatives)
- 1 1/2 teaspoons baking powder
- 1 teaspoon kosher salt
- 1 tablespoon neutral oil (like vegetable, canola, or grapeseed)
- 1 egg (at room temperature)
- 1 egg white (at room temperature)
- 3/4 cup milk (at room temperature)
Step 2: Preheat Your Oven
Preheat your oven to 400°F (200°C). If you have a pizza stone, now is the time to place it in the oven. If not, simply use an overturned rimmed baking sheet—you’ll still get fantastic results!
Step 3: Mix Up the Dry Ingredients
In a bowl (or the bowl of your stand mixer fitted with the paddle attachment), combine the flour, xanthan gum, tapioca starch, baking powder, and salt. Give it a quick mix or pulse in your food processor to ensure everything is well-combined.
Step 4: Add the Wet Ingredients
Now, add the olive oil, egg, egg white, and milk to your dry mixture. Time to get mixing! Beat until it’s very well-combined, and the dough pulls away from the sides of the bowl. This process should take around 2 minutes. The dough will be thick and tacky—it should look like a soft cookie dough.
Step 5: Divide Your Dough
Gently turn the dough out onto a very lightly floured surface. With a bench scraper or a sharp knife, divide the dough into 8 equal parts. Roll each part into a ball, then pat it down into a disk, about 1/4-inch thick.
Step 6: Bake Those Pitas
Place the disks about 1-inch apart on a piece of unbleached parchment paper. Once you’re ready, transfer them to the oven (on the pizza stone or overturned baking sheet) and bake for 2 minutes.
Now, here’s the fun part: work quickly! Open the oven, invert the pitas, and allow them to bake for an additional minute. After that, re-invert them and let them bake until puffed and pale golden on top—about another minute.
Step 7: Cool and Slice
Remove the pitas from the oven and let them cool for about 3 minutes. Once cool enough to handle, gently slice each round in half through the center. With a sharp knife, coax open the center of each pita half. Now they’re ready to fill with your favorites!
How to Serve Easy Gluten Free Pita Bread | Ready in Under 30 Minutes
These pitas are incredibly versatile! You can serve them as a base for Mediterranean-style wraps filled with grilled chicken, roasted veggies, hummus, or tzatziki sauce. They also make a delightful accompaniment to a platter of olives and cheese for a charming appetizer at your next gathering. Try filling them with fresh salads, or even turn them into mini pizzas! The kids love building their own “pita creations,” making mealtime fun and interactive.
How to Store Easy Gluten Free Pita Bread | Ready in Under 30 Minutes
Storing your pitas is easy—just let them cool completely, then place them in an airtight container. They can be stored in the refrigerator for up to 3 days. If you want to keep them for longer, they freeze beautifully! Just wrap each pita tightly in plastic wrap and place them in a freezer bag. When you’re ready to enjoy, simply thaw them at room temperature or warm them in the oven for a delightful homemade treat anytime. These meal prep storage tips will ensure you always have fresh pitas at the ready!
Tips to Make Easy Gluten Free Pita Bread | Ready in Under 30 Minutes
- Mix It Up: For added flavor, you can incorporate dried herbs or garlic powder into your dry ingredients. This will give a lovely taste to your pitas that pairs perfectly with savory fillings.
- Flour Alternatives: If you don’t have tapioca starch on hand, you can substitute with cornstarch or even arrowroot powder. Just remember, the blend should be gluten-free!
- Handling Stickiness: If your dough is sticking a lot, sprinkle a little more gluten-free flour on your surface while rolling out the disks. Just be careful not to add too much!
- Timing is Key: Pay attention to baking times! Every oven is different; yours may bake a little faster or slower than the 2-4 minutes suggested. Keep an eye on your pitas, and adjust as necessary.
Variation
If you’re looking for a gluten-free version with a twist, try adding some crushed sunflower seeds or flaxseeds to the dough for a nutty flavor and a bit of crunch. Alternatively, for a vegan substitute, swap the egg for a flaxseed egg (1 tablespoon ground flaxseed mixed with 2.5 tablespoons water) and use a plant-based milk. This way, everyone can enjoy juicy, warm pita bread without compromising their dietary needs.
Pairing Ideas
Let’s make your meal even more delightful! Pair your Easy Gluten Free Pita Bread with a refreshing Greek salad and a lightly dressed lemon vinaigrette for a complete meal. If you’re searching for drinks, a well-chilled mint lemonade or homemade iced tea would be the perfect complement to wash it all down. For dessert, consider serving a small bowl of fresh fruit or a simple yogurt with honey to round off your meal.
FAQs
1. Can I use regular flour instead of a gluten-free blend? No, this recipe is specifically tailored for gluten-free flour blends. Using regular flour will not yield the same results.
2. What if I don’t have xanthan gum? If your gluten-free flour blend already contains xanthan gum, you can skip this step. Otherwise, you can use ground psyllium husk or simply omit it—just keep in mind the texture may vary slightly.
3. How do I make these pitas more flavorful? You can add herbs like rosemary, thyme, or garlic powder to the dry ingredients for an extra flavor boost. It’s a simple way to elevate the taste!
4. Can I prepare the dough in advance? Absolutely! You can prepare the dough a few hours ahead of time and store it in an airtight container in the refrigerator. Just allow it to come to room temperature before rolling it out and baking.
And there you have it! A delightful journey to creating your own Easy Gluten Free Pita Bread in under 30 minutes, with all the tips and tricks you need to make it a hit with the family. Enjoy your homemade goodness!
PrintEasy Gluten Free Pita Bread | Ready in Under 30 Minutes
- Total Time: 15 minutes
- Yield: 5 1x
- Diet: Gluten Free
Ingredients
- 1 3/4 cups all-purpose gluten-free flour blend
- 1 teaspoon xanthan gum (omit if your blend already contains it)
- 1/4 cup Expandex modified tapioca starch (See Recipe Notes)
- 1 1/2 teaspoons baking powder
- 1 teaspoon kosher salt
- 1 tablespoon neutral oil (like vegetable, canola, or grapeseed)
- 1 egg (at room temperature)
- 1 egg white (at room temperature)
- 3/4 cup milk (at room temperature)
Instructions
- Preheat the oven to 400°F (200°C). Prepare your baking surface.
- In the bowl of your stand mixer or food processor, mix together the gluten-free flour, xanthan gum, tapioca starch, baking powder, and salt.
- Add the oil, egg, egg white, and milk, then mix until combined and dough pulls away from the sides.
- Turn the dough out on a floured surface and divide into 8 parts.
- Roll each part into a ball and then flatten into disks about 1/4-inch thick.
- Place the disks on parchment paper and bake for 2 minutes.
- Invert the pitas and bake for another 1-2 minutes, until they are puffed and lightly golden.
- Cool for a few minutes, slice, and enjoy!
- Prep Time: 10
- Cook Time: 5
- Category: Gluten free
Nutrition
- Serving Size: 20g
- Calories: 30 KCAL
- Sugar: 1
- Sodium: 2
Keywords: Gluten free Pita Bread
