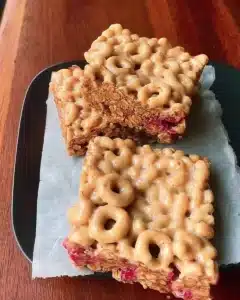
This Dubai chocolate filling recipe? Just two things. Crunch and cream.
That’s what got me.
I saw the bar. Broke open. Green inside. Threads of pastry. A little shine. That was enough.
I didn’t want to make the whole thing. Just the filling. That’s what stuck.
So I started testing. I burned the first tray of Kataifi. The second one too. I under-blended the pistachios. Then over-blended. I kept going.
Two batches made it through. One is soft. The other’s more dense. Both work.
This is what I landed on.
Table of Contents
What Is Dubai Chocolate Filling? The Viral Sensation Explained
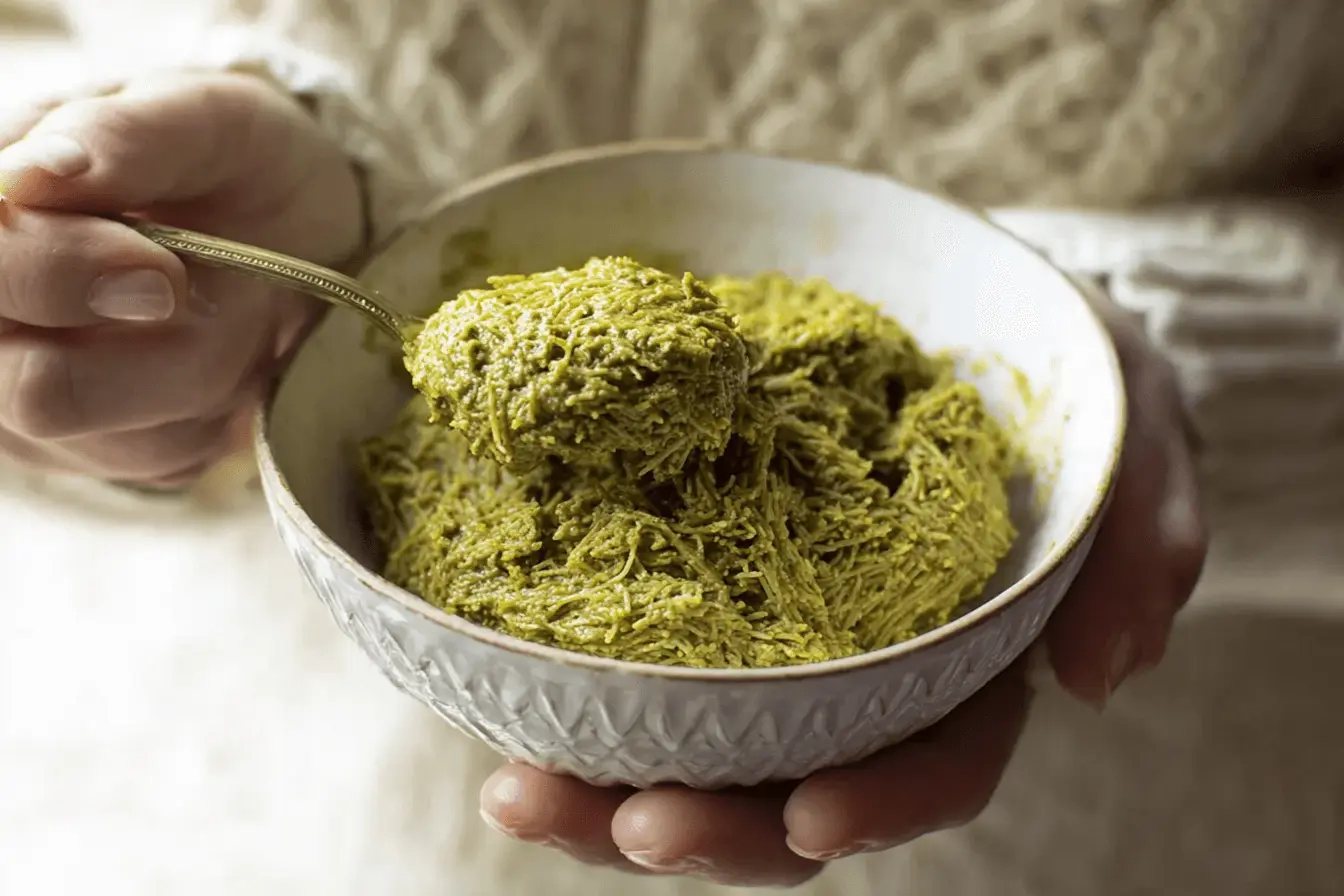
It’s two parts. Toasted Kataifi and a pistachio base.
That’s it.
The Kataifi brings the crunch. It’s a shredded pastry, kind of like fine angel hair. You toast it in butter until it’s golden and crisp. Smells incredible. Tastes even better.
The pistachio part can go two ways. You can make a cream. Or a butter. Both use roasted pistachios. Both hold everything together. It just depends if you want something light and smooth or rich and thick.
Put those two together and you get the filling that everyone’s been posting. Crunchy. Creamy. Sweet in the quiet way.
The Core Ingredients: A Deep Dive
This filling only works because of what’s in it. And how you treat it.
Let’s start with the base.

All About Kataifi Pastry (The Secret to the Crunch)
Kataifi looks like shredded phyllo. You’ll find it in the freezer at Middle Eastern or Mediterranean stores. Sometimes it’s labeled as knafeh dough. Same thing. Just different names.
It feels like soft threads when it’s thawed. Almost stringy. That’s what makes the crunch happen later.
What I Look For
- Frozen, not dried. You want the kind that comes in a block, not the crunchy stuff in a bag.
- Skip it if there’s frost all over or cracks down the side. That’s freezer-burned and it won’t toast right.
- The color should be pale. Off-white. If it’s leaning yellow, leave it on the shelf.
To thaw, the fridge overnight is best. But if you’re in a rush, the counter works too. Just toss a clean towel over it so it doesn’t dry out or go stiff on you.
The Pistachio Base: Cream vs. Butter (Your Key Decision)
Either one works. It’s just about what you’re into.

Here’s how I think about it:
| Feature | Pistachio Cream | Pistachio Butter |
|---|---|---|
| Texture | Soft, smooth | Thick, dense |
| Flavor | Light, sweet | Deep, roasted |
| Best For | Balanced desserts | Strong pistachio flavor |
What I like: Cream with dark chocolate. Butter with milk chocolate. But that’s just me.
How to make Dubai chocolate filling recipe? (step by step guide)
Part 1: How to Toast Kataifi Perfectly
You’ll need:
- 1½ cups kataifi (the shredded phyllo stuff)
- 4 tbps melted butter
What I do
First, let the kataifi thaw. I usually put it in the fridge overnight, or I just leave it on the counter for a bit. Just keep it covered with a towel so it doesn’t dry out or go stiff.
Once it’s soft, use your hands to pull it apart. Like you’re fluffing up a pillow. It should go from clumpy to light and stringy. That’s what you want.
Drizzle the melted butter over the top. Then get in there with your hands and toss it around. Make sure it all gets a little shine but don’t drench it.
Spread it out on a sheet pan. Not packed in. Just a loose layer.
Bake at 325°F for about 15 to 20 minutes. I check on it a couple times and give it a gentle stir so it browns evenly.
Once it’s golden and smells kinda nutty, pull it out and let it cool all the way. Like, really cool. Warm kataifi in filling = sad, soggy mess. Let it crisp up. You’ll thank yourself later.

Part 2: How to Make the Pistachio Base (Choose Your Path)
Both versions start the same. Toast the pistachios. Let them cool a bit. Then you decide where to take them.
You just need a food processor that won’t overheat.
Method A: Homemade Pistachio Butter Recipe
You’ll need:
- 1½ cups raw pistachios
- Optional: a spoon of powdered sugar, pinch of salt
What I do:
Spread the pistachios on a baking sheet. Pop them in the oven at 350°F for about 8 minutes. They’ll smell toasty when they’re ready. That’s your cue.
Let them cool just enough so you don’t fog up your food processor.
Toss them in and blend. Stop now and then to scrape the sides. First it’s clumpy. Then it’s a little oily. Then it turns into butter. You’ll see it happen.
If you want it sweeter or smoother, go ahead and stir in a little sugar and salt. I usually do.

Method B: How to Make Pistachio Cream
Start with that butter. Then add:
- ¼ cup sweetened condensed milk
- 1 tablespoon tahini (totally optional, but nice)
Then blend it again.
Part 3: Time to Assemble the Dubai chocolate Pistachio Filling
Alright. That kataifi? It needs to be cold. Not warm. Not even a little warm. Cold. That’s what keeps the crunch from going soft when you mix it in.

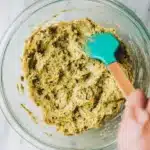
Spoon your pistachio base into a bowl. Doesn’t matter if it’s the cream or the butter. Use what you made.
Toss in a handful of Kataifi. Use a spatula and fold it in gently. Just fold the strands through the cream so they stay light and don’t get crushed.
Keep going. Fold. Look. Add more. You’ll see when it starts to come together.
Stop when everything looks coated but still loose. You don’t want clumps. You don’t want dry bits hiding underneath. Just a soft mix that holds when you press it but still looks like you made it by hand.
That’s your filling. Nothing fancy. Just the good stuff. Ready to get tucked into whatever dessert you’ve got planned.
Expert Tips & Troubleshooting (My Secrets for Success)
This is the stuff I wish I’d known before batch one.
Let the Kataifi cool all the way. Not just kinda cool. I mean cool-cool. If it’s still warm, it’ll let off steam and turn soft when you mix it in. And that crunch you worked for? Gone.
Don’t rush the pistachio blend. If it still looks like paste, it’s not done. Let it run longer. It should look glossy.
Let the pistachios cool just a bit after roasting. Not ice cold, but not piping hot either. Warm nuts blend smoother. Their oils are looser, so you get that creamy texture without burning out your food processor.
Too oily? You might’ve overmixed once the Kataifi was in. Fold gently. Stop when it just comes together.
Can I make it ahead?
Yep. You can make it ahead. Just seal it up tight and keep it out on the counter. It stays crisp that first day. Maybe hangs on into day two. After that, it softens. Still good. Just different.
What if I wanna try other nuts?
Go for it. I’ve done almonds. Hazelnuts too. It still works, but the vibe changes. Texture’s a bit different. Flavor heads a different way. Not better. Just not pistachio.
Stuff like this might seem small. But it adds up.
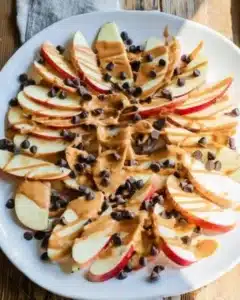
How to Use Your Dubai Chocolate Filling recipe: 10 Amazing Dessert Ideas
Look, once this filling’s in the fridge, it doesn’t just sit there. I start grabbing whatever’s around and trying stuff. These ones stuck.
How to make the Viral Dubai Chocolate
I melt some chocolate, pour a little into a mold, wait a minute, then spoon in the filling. Top it off with more chocolate. Into the fridge it goes. That’s all I do.
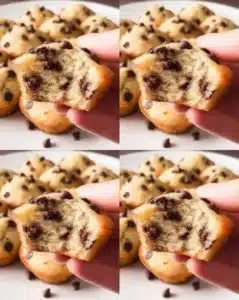
Dubai Chocolate Cupcakes
Bake chocolate cupcakes. Use a spoon or the back of a piping tip to hollow out the middle. Fill with the good stuff. That’s it.
Dubai Chocolate Dates
Get some Medjool dates. Pull out the pits. Pack in the filling. Dip in chocolate if you’re feeling it. Let them set.
Dubai Chocolate Cheesecake
Spread the filling over the top or swirl it in before baking. No rules here. Just makes it better.
Dubai Chocolate Cookies
Sandwich the filling between two soft chocolate cookies. Press gently. Chill if you want. Or eat it right away. I do both.
Dubai Chocolate Ice Cream
Soften a pint of vanilla or chocolate. Fold in chunks of the filling. Freeze it back up. That’s it.
Dubai Chocolate Cake
Spoon the filling between cake layers or smear it on top. Works either way.
Dubai Chocolate Brownies
Drop spoonfuls of filling on top before baking. Swirl it a little if you want. It bakes into these chewy, crunchy pockets.
Dubai Strawberry Cups
Cut the tops off big strawberries. Scoop out the middle. Fill it up. That’s it. One bite and gone.
Dubai Chocolate Smoothie
This one’s basically dessert you can drink. I toss a scoop of the filling into the blender with vanilla custard ice cream, a splash of milk, and a bit of the chocolate shell. Blend it until it’s thick but sippable.
Then I pour it into a cup I lined with more shell and top it with toasted Kataifi and some pistachios. Right before I drink it, I give the cup a little squeeze so the shell cracks inside. You get cold, creamy, crunchy, and chocolatey in every sip. No need to leave the house.
These all came from just having extra filling on the counter and not wanting it to go to waste.
Frequently Asked Questions (FAQ)
What’s the filling made of?
Toasted Kataifi and pistachio. That’s it. The crunch comes from the pastry, and the richness? That’s your call. Cream or butter. I bounce between the two depending on what’s left in the fridge.
Is kataifi the same as knafeh?
Pretty much. Same dough. Knafeh’s usually the name for the dessert. Kataifi is what it’s called in the freezer aisle. I use both depending on who I’m talking to.
Can I use store-bought pistachio paste?
I’ve used it before. Mostly when I was tired and didn’t feel like pulling out the food processor. It’s sweeter. A little looser. Gets the job done, but you’ll notice it’s not the same. The homemade stuff just hits better.
How do I keep the kataifi crunchy?
Let it cool all the way. Like, actually cool. Not “warm-ish.” If it’s warm, it’ll steam and go soft when you mix. Then you’ve got a soggy filling. No thanks.
Where do I find kataifi pastry?
Middle Eastern shops usually have it in the freezer. Online works too. Look for “shredded phyllo”, the soft kind. Not dried. Not in a box with dust on it.
Can I make the filling ahead of time?
You can. It’ll stay crunchy for a day, maybe two, if it’s in something airtight. Room temp, not the fridge. After that, it softens a bit. Still good, just not crunchy. Like leftover fries. Still snackable.
Wrap It Up
This one’s easy to make your own. Some days I go for the cream, other days it’s the butter. Depends what sounds good. I’ve never once regretted either.
That Kataifi’s the good part. Toast it right and it stays crispy, even when you mix it in.
Once it’s all together, use it however you want. Bars. Cupcakes. Dates. I even put it on toast once and called it breakfast.
If you try it, let me know how it went. Cream or butter? What’d you fill? Drop a comment or tag me on Facebook or Pinterest.
Go make a batch. And yeah, maybe keep a spoon for yourself before the rest disappears.

Dubai Chocolate Filling
Ingredients
Method
- Allow the kataifi to thaw, ideally overnight in the fridge or for a short time on the counter covered with a towel.
- Once thawed, fluff the kataifi with your hands to separate it.
- Drizzle melted butter over the kataifi and mix until it shines but is not drenched.
- Spread the kataifi evenly on a sheet pan and bake at 325°F (163°C) for 15-20 minutes, stirring occasionally until golden brown and nutty.
- Remove and let it cool completely.
- Toast the pistachios in the oven at 350°F (177°C) for about 8 minutes until fragrant.
- Allow pistachios to cool slightly, then blend in a food processor until smooth to make pistachio butter or continue with added condensed milk and tahini to make pistachio cream.
- Ensure that the toasted kataifi is cooled before mixing.
- In a bowl, combine the pistachio base (either cream or butter) with a handful of kataifi.
- Gently fold the kataifi into the pistachio mixture until everything is coated but still loose.