You ever have one of those days where everything feels all kinds of chaotic? I threw together these Frozen Yogurt Granola Cups last Saturday when my dog was barking at the neighbor’s cat, and my kid was on an epic juice spill spree.
You know the kind—one minute you’re trying to whip up a healthy treat, and the next you’ve got a juice box mix-up that could rival a science project. But guess what? These little cups turned out SO GOOD!
They became our new go-to when we need a sweet pick-me-up that doesn’t leave us feeling like we need a nap afterward. Plus, they’re ADORABLE and totally customizable. If you’re looking for something that hits the spot and brings everyone to the table, you’ve found it!
Why You’ll Love This Recipe
- Quick and Easy: Whip these up in under 10 minutes (plus freeze time).
- Budget-Friendly: Simple ingredients that won’t break the bank.
- Freezer Friendly: Make a batch and store for later. Perfect for a grab-and-go snack!
- Kid-Approved: Every kid I’ve fed them to is ALL in.
- Comforting: Each bite feels like a warm hug, bursting with nostalgia.
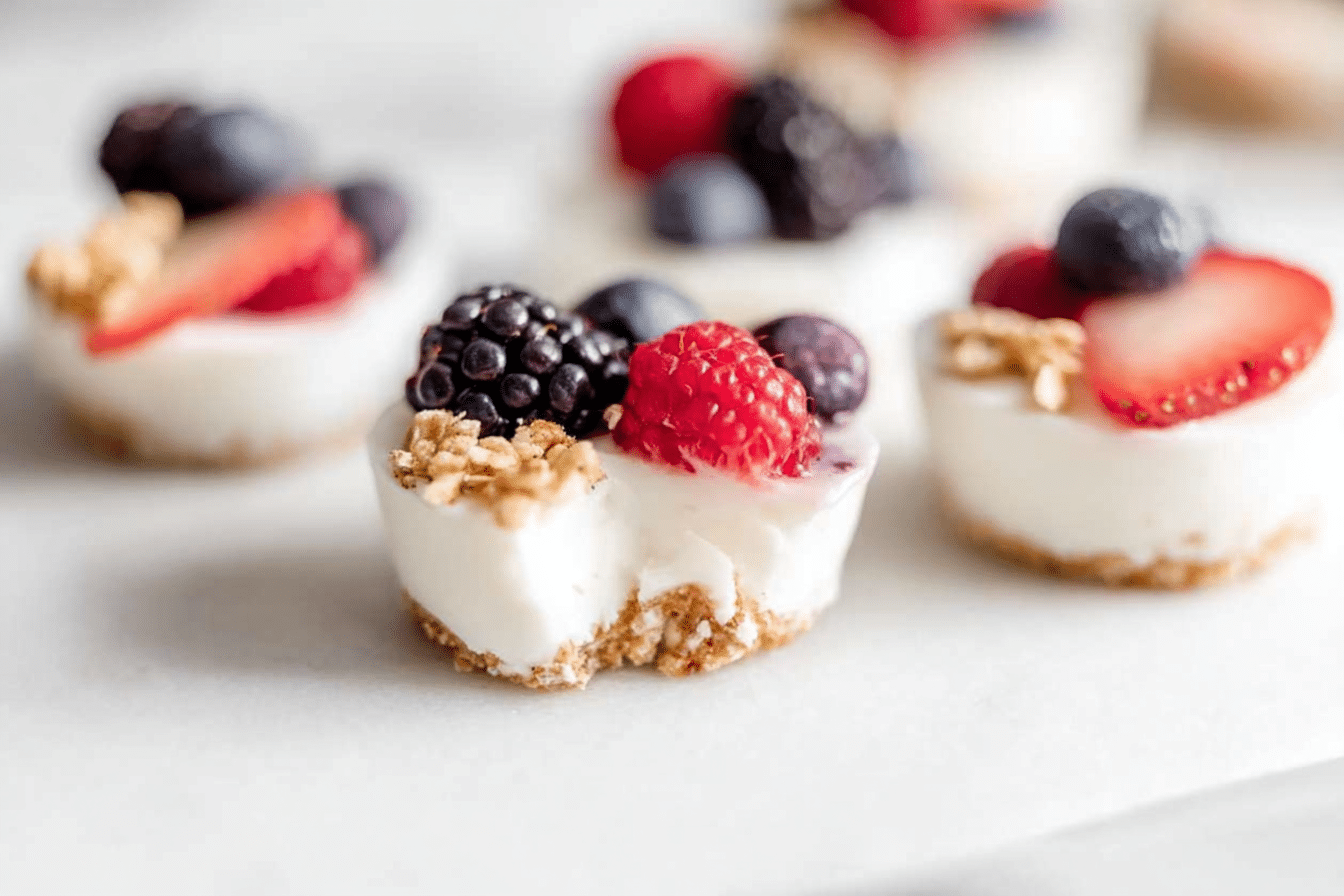
These Frozen Yogurt Granola Cups are a twist on the standard yogurt parfait. The granola base adds a hidden crunch that sends the flavor over the edge. Trust me, your taste buds will thank you!

Ingredients Needed
Base
- 3/4 cup rolled oats
- 1/2 tsp cinnamon (because a little spice makes everything nice)
- 1/4 cup almond butter (or peanut butter if you prefer)
- 3-4 tbsp honey (adjust based on how sweet you like it)
- 1 tsp vanilla extract (the essence of yum)
Filling
- 1 1/2 cups Greek yogurt* (check out the note below)
- Berries of your choice for topping (strawberries, blueberries—anything goes!)
*Note: Use plain or flavored Greek yogurt, depending on your mood.
How to Make This Recipe?
Step 1: Make the Granola Base
Mix the oats, cinnamon, almond butter, honey, and vanilla extract together in a bowl until it forms a sticky dough. If you’re wondering about the texture, you want it to stick together nicely. If it feels dry, just add a smidge more almond butter and honey to boost the stickiness.
Step 2: Prep the Muffin Pan
Line a muffin pan with muffin liners. Add a spoonful of that granola goodness into the bottom of each muffin cup. Get in there and press firmly with your fingers—this is your base, and you want it sturdy enough to hold all the yummy yogurt.
Step 3: Dollop on the Yogurt
Spoon a dollop of Greek yogurt into each cup on top of the granola base. Then, go wild with your favorite berries. You can even sprinkle on any leftover granola if you’ve got some extra hanging around.
Step 4: Freeze to Perfection
Pop these bad boys in the freezer for at least 4 hours. Trust me, you’ll want to let them set fully. When you’re ready to serve, just let them thaw for a few minutes—nobody wants dentist-level cold.
How to Store It & Expert Tips
How to Store It
- Fridge: If you want to keep some fresh for a few days, store in the fridge. Just keep them in an airtight container.
- Freezer: Make a big batch and stash them in the freezer. They can last up to a month!
Expert Tips
- Flavor Boosters: Drizzle some chocolate on top for a little extra decadence.
- Nut Swaps: Don’t have almond butter? Use peanut butter, cashew butter, or even sunflower seed butter for a nut-free option.
- Granola Base Variations: Throw in some chopped nuts or seeds for extra crunch if you’re feeling adventurous.
Conclusion
And there you have it! These Frozen Yogurt Granola Cups are equally a crowd-pleaser and a simple way to keep healthy snacks on hand. They come together easily and offer a delightful mix of textures and flavors that feels just right.
If you give it a try, drop me a star rating and let me know how much you love them! Share it with your cousin who never shows up empty-handed, and let’s hear how you put your own spin on this recipe. I wanna hear it!
FAQ Section
How long do these last in the freezer?
Here’s the deal: They can be frozen for up to a month. Best give ‘em about 10 minutes to thaw before digging in!
Can I use regular yogurt?
Real talk: Sure thing! Just keep in mind that Greek yogurt gives a thicker texture, but regular yogurt will work; it’ll just be creamier and less sturdy.
What’s the best way to eat these?
Grab a spoon and dig right in! You can even crumble them if you want a messier dessert experience.
If your sweet tooth isn’t done yet, my Easy Chocolate Chip Cookies are a classic that always hit the spot when you crave something cozy.