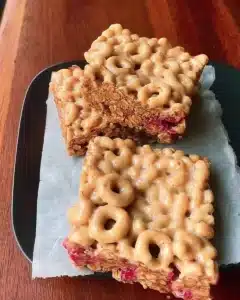
I still remember the first time I pulled a batch of these little guys out of the oven. The smell was SO GOOD, it did its best to drown out my dog barking at a squirrel in the backyard. My kids, who were supposed to be doing homework, suddenly turned into muffin detectives, sniffing out the deliciousness from across the house. It was a mini muffin takeover! Now, every time I whip up these Little Bites Muffins, it’s like hosting a family reunion right in our kitchen—everyone gathers around, eyes wide, waiting for that first taste. These muffins packed with comfort are UNREAL, and the secret? They’re ridiculously easy to pull off. Trust me, if your kitchen isn’t smelling like a cloud of vanilla and sweet baked goodness, you’re doin’ it wrong!
Why You’ll Love This Recipe
- Quick and Simple: Whip these up in under 30 minutes—perfect for busy mornings.
- Budget-Friendly: Most ingredients are staples you probably already have lying around.
- Kid-Approved: Your kiddos will devour them in no time!
- Freezer Friendly: Make a big batch and stash some away for later—winning!
- Nostalgic Comfort: It’s like a warm hug from your favorite aunt!
These aren’t your average muffins. They’re mini, they’re cute, and they bring a little bit of joy in every bite. Honestly, there’s something about eating a muffin that’s, well, the size of your palm that just hits differently!
Ingredients Needed
For the Muffin Base:
- 1 cup all-purpose flour: The backbone of any good muffin—it holds it all together!
- 1/2 cup sugar: Just the right amount of sweetness to keep things cheerful.
- 1/2 teaspoon baking soda: This little guy helps your muffins rise beautifully.
- 1/4 teaspoon salt: A pinch to balance out the sweetness!
For the Wet Mix:
- 1/2 cup milk: Dairy makes everything creamier and richer.
- 1/4 cup vegetable oil: Keeps the muffins moist—don’t skip this!
- 1 large egg: Acts as a binding agent; we need that fluffiness.
- 1 teaspoon vanilla extract: Because life is too short for anything less than the good stuff.
How to Make This Recipe?
Step 1: Preheat Your Oven
First things first, let’s get that oven warmed up to 350°F (175°C). While that’s happening, you can grease your mini muffin pan to make sure they pop right out later. It’s all about the release, folks.
Step 2: Mix the Dry Ingredients
In a good-sized bowl, toss together your flour, sugar, baking soda, and salt. Give it a good stir to combine everything evenly. You want this mix to be uniform, so each muffin has the same great flavor.
Step 3: Whisk the Wet Ingredients
In another bowl, whisk together your milk, vegetable oil, egg, and vanilla extract. What you’re looking for here is a smooth pourable batter—no lumps, just a lovely, inviting mixture.
Step 4: Combine Wet and Dry
Pour that yummy wet mix into the bowl with the dry ingredients. This is where the magic happens! Stir carefully until just combined. It’s okay if it’s a bit lumpy—overmixing will make for tough muffins, and we want light and fluffy.
Step 5: Fill the Muffin Pans
Grab your prepped muffin pan and fill each cup about two-thirds full with the batter. I love a good muffin top, so don’t skimp here!
Step 6: Bake
Pop them in the oven and set your timer for 10-12 minutes. You’ll know they’re done when a toothpick inserted into the center comes out clean. Trust your nose; the smell is a dead giveaway—SO GOOD!
Step 7: Cool
Let those lil’ bites cool in the pan for a few minutes before transferring them to a wire rack. Patience pays off here; nobody wants a burnt tongue, right?
How to Store It & Expert Tips
How to Store It
These mini muffins love a good home, so store leftovers in an airtight container in the fridge for up to a week. Want to save some for later? Just pop ‘em in the freezer! They’ll keep for about three months. To reheat, toss them in the microwave for about 20 seconds, and they’ll be good as new!
Expert Tips
- Swap Milk: Got almond or oat milk? No problem. These muffins can roll with the punches.
- Add-Ins: Toss in some chocolate chips, nuts, or dried fruit! Get creative!
- Flavor Boost: A dash of cinnamon or nutmeg can kick up the cozy level even more.
- Batch It: Double or triple the recipe and stash some away for unexpected guests or snack attacks.
Conclusion
And there you have it! These Little Bites Muffins are not just a recipe; they’re a tradition waiting to happen. They’re easy to make and loved by all, and they smell like home. I bet once you try them, they’ll be your go-to for breakfast or snack time. If this recipe made your taste buds dance, don’t forget to give it some stars in the comments below. And hey, share it with your cousin who never shows up empty-handed. Did you add your own spin? I wanna hear it!
FAQ Section
Can I use whole wheat flour for these muffins?
Here’s the deal: you can swap out some of the all-purpose flour for whole wheat, but they might be a bit denser. Just keep an eye on the texture!
How long will these keep in the freezer?
Real talk: they’ll last about three months in the freezer. Just make sure they’re tightly wrapped. No freezer burn on my watch!
Can I make mini muffins into regular-sized ones?
Absolutely! Just fill your regular muffin pan and increase the baking time to around 15-18 minutes. Watch them closely!
If you’re not done with the sweet stuff yet, check out my “Nutty Chocolate Chip Cookies” for another family favorite that’ll have everyone clamoring for more!

Little Bites Muffins
Ingredients
Method
- Preheat your oven to 350°F (175°C) and grease your mini muffin pan.
- In a bowl, toss together flour, sugar, baking soda, and salt. Stir to combine.
- In another bowl, whisk together milk, vegetable oil, egg, and vanilla extract until smooth.
- Pour the wet mix into the dry ingredients and stir gently until just combined. It's okay if it's a bit lumpy.
- Fill each muffin cup about two-thirds full with batter.
- Bake in the preheated oven for 10-12 minutes. Muffins are done when a toothpick comes out clean.
- Let cool in the pan for a few minutes before transferring to a wire rack.


