Hey there! So picture this: I was in the kitchen, my kid was busy coloring (and making a glorious mess, I might add), and the dog was barking at a squirrel like it was the end of the world.
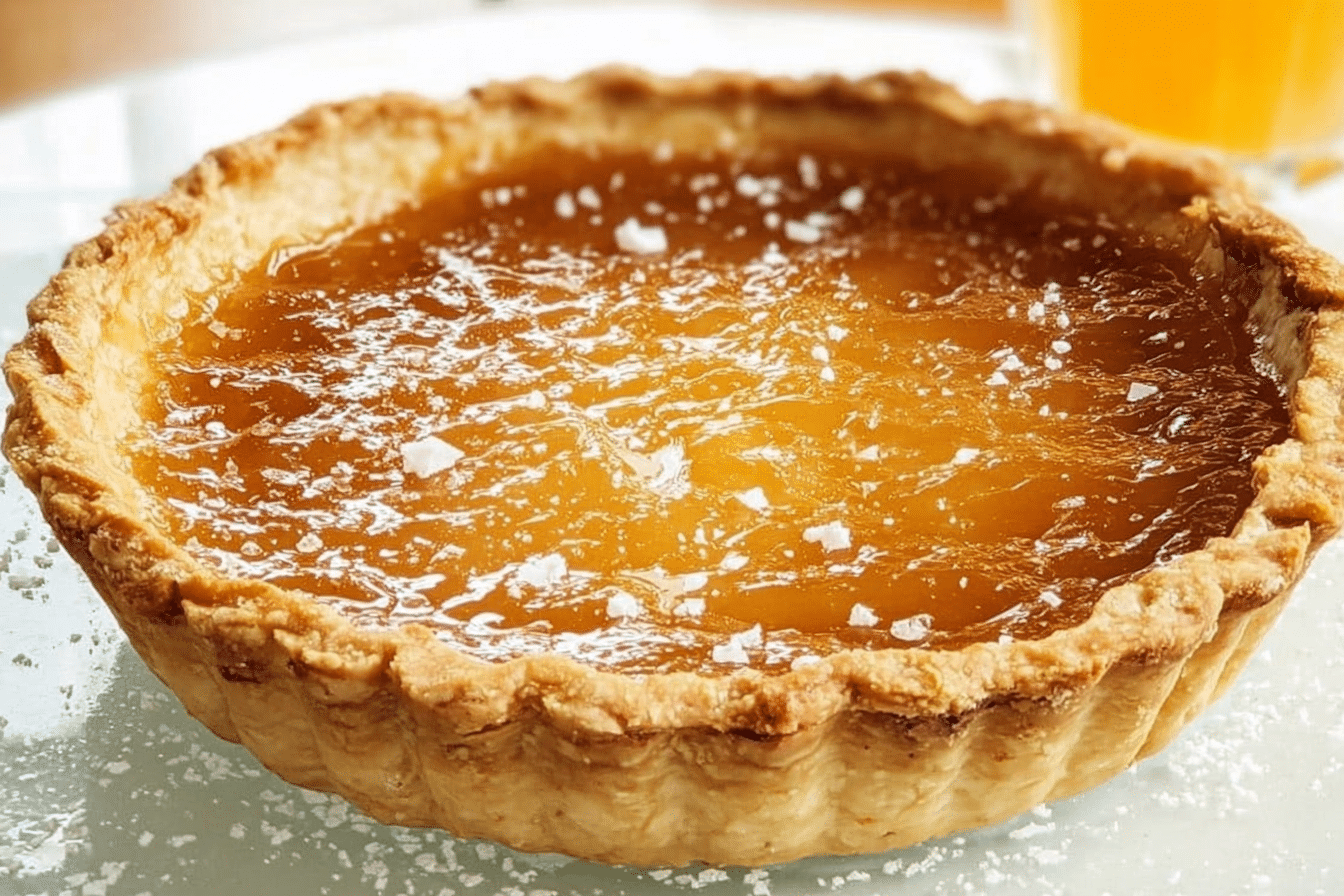
I decided it was the PERFECT moment to whip up a Salted Honey Pie. This pie has this UNREAL combination of sweet and salty that makes you question everything you thought you knew about dessert.
The first time I tasted it, I was hooked; every bite felt like a warm hug mixed with a bit of sass. If you’re ready for a pie that’s SIMPLE but packs a punch, let me show you how to make this life-changing dessert!
Why You’ll Love This Recipe
- Super Quick & Easy: No pre-baking needed. You’ll be in and out of the kitchen before you can say “pie.”
- Kid-Approved: My kids practically inhale it, and I bet yours will too.
- Perfect for Any Occasion: Birthday parties, holiday dinners, or just because—it works every time!
- Unforgettable Flavor: The balance of honey’s sweetness and sea salt’s kick is just plain genius.
- No-Fuss Ingredients: Just a handful of pantry staples to create something special.

Ingredients Needed
For the Pie Crust:
- Pie crust (refrigerated or homemade)
- Optional: A sprinkle of sugar to add a sweet crunch
For the Custard Filling:
- 4 large egg yolks, lightly beaten
- 2 1/2 cups (600 ml) heavy whipping cream
- 2/3 cup (150 g) packed light brown sugar
- 1/3 cup (45 g) cornstarch, sifted
- 1/2 tsp salt
- 1/2 cup (120 ml) honey
- 2 tsp vanilla extract
- Flaky sea salt, for sprinkling on top
How to Make This Recipe?
Step 1: Prepare Your Pie Crust
Let’s kick things off with the crust! Grab a deep dish 8-inch pie pan or a 9-inch pan. If you’re using refrigerated dough, just pop it in, no need to pre-bake this one! If you’re going homemade, make sure to chill that dough for at least 30 minutes. Cold butter means flaky crust perfection! For a nice touch, sprinkle a bit of sugar on top before baking to get that sweet crunch.
Step 2: Heat and Whisk
In a medium saucepan, toss together the heavy cream, brown sugar, cornstarch, and salt. Place it on medium heat and stir like your life depends on it! We’re heating this up until it’s bubbling and thick. I can’t stress enough how delicious your kitchen will smell during this step—brown sugar caramelizing is like a magic spell that draws everyone to the kitchen.
Step 3: Temper the Eggs
Here’s where it gets a bit fancy—tempering the egg yolks. Take a ladle of the hot cream mixture and add it to the beaten yolks while whisking constantly. Gradually pour in more cream, whisking until smooth. You’re giving those yolks a warm welcome, so they don’t scramble in the next step!
Step 4: Combine and Flavor
Now, pour the egg mixture back into the saucepan and stir until smooth. Add the honey and vanilla extract. This is your moment—honey gives the custard that luscious caramel-like flavor and the vanilla just makes everything feel cozy.
Step 5: Fill ‘Er Up
Pour that gorgeous custard into the chilled pie crust. Make sure it’s not too hot; we’re aiming for warm but not scalding. The mix should look creamy and thick, like a bowl of velvet! Spread it evenly to avoid those pesky air pockets.
Step 6: Bake
Pop the pie into a preheated oven at 375°F (190°C) for 40-45 minutes. You want it to bubble up with a golden top—that’s your cue. It’s normal if it looks a little jiggly when it comes out; it’ll firm up as it cools.
Step 7: Cool Down
Let the pie cool on the counter until it hits room temperature, then toss it in the fridge until it’s completely chilled. This step is HUGE for the texture and flavor—trust me!
Step 8: Sprinkle and Serve
Before serving, shower a good amount of flaky sea salt over the top. That salty crunch brings out the honey’s sweetness like nobody’s business. Slice it into 8-10 pieces and get ready for everyone to ask, “Can I have seconds?”
How to Store It & Expert Tips
How to Store It
Pop any leftovers (if there are any!) in the fridge, tightly covered. It’ll stay good for about 3-4 days. If you wanna keep it longer, you can freeze it, but it’s best served fresh!
Expert Tips
- Flaky Crust Hack: If using a store-bought crust, make sure to let it chill for a bit before filling for the best results.
- Flavor Boosters: Try adding a pinch of nutmeg or cinnamon to the filling for an extra flavor kick.
- Consistency Check: Your pie might look jiggly at first—it’s okay! It will firm up as it cools, so don’t overbake.
Conclusion
And there you have it! This Salted Honey Pie is more than just dessert; it’s a family favorite bound to steal the show. Remember, the combination of sweet and salty is absolutely MAGIC, and I know you’re gonna love it. If this pie put a smile on your face, drop a star rating and let me know how it went. Share it with your cousin who never shows up empty-handed! Did you add your own spin? I wanna hear it!
FAQ Section
What’s the best way to serve Salted Honey Pie?
Real talk: Serve it chilled with a light sprinkling of that flaky sea salt for the best flavor contrast.
Can I use different types of honey?
Absolutely! Wildflower or clover honey gives you different flavors, so feel free to experiment!
How do I know when the pie is done baking?
Look for that golden top and a fully jiggly middle—don’t worry; it will continue to set as it cools!
If your sweet tooth isn’t done yet, my Chocolate Chip Cookie Skillet is the ultimate warm dessert perfect for family movie nights!

