I still remember the first time I whipped up a batch of these Espresso Chocolate Chunk Scones. I was knee-deep in chaos—my dog was barking at some poor, unsuspecting squirrel from the window, and my kid was busy creating a masterpiece on the kitchen table with stickers and glue, which mainly resulted in a giant mess.
Amid all this, the smell of rich espresso and melting chocolate wafted through our home, and somehow, it all felt perfect. It was one of those moments where the kitchen became my sanctuary, and these scones? They were SO GOOD they practically stole the show! So relax, sip your morning coffee (or not!), and let’s get baking.
Why You’ll Love This Recipe
- Quick & Easy: Whip these up in under 30 minutes, and you’re golden.
- Comfort on a Plate: Perfect for breakfast or an afternoon treat.
- Kid-Approved: My little one has devoured these after school more times than I can count!
- Crowd-Pleaser: Impress friends and family with minimal effort.
- Freezer Friendly: Make ahead and stash away for those busy mornings.
These scones are anything but ordinary. While typical scones settle for a light sweetness, we threw in dark chocolate and a hit of espresso to take flavor to the next level. Trust me on this—you won’t want to turn back once you try these!

Ingredients Needed
For the Scones
- 4 1/4 cups all-purpose flour
- 1/2 cup plus 1 TBSP sugar
- 2 tsp baking powder
- 1/2 tsp baking soda
- 1/2 tsp salt
- 2 1/4 sticks (18 TBSP) very cold, unsalted butter, cubed
- 1 1/3 cups buttermilk
- 1/4 cup freshly brewed espresso, cooled (can substitute strong coffee)
- 1 cup dark chocolate, chopped
For the Egg Wash
- 1 large egg beaten with 2 TBSP heavy cream
For the Glaze
- 1/2 cup unsalted butter
- 2 cups confectioner’s sugar
- 1/2 cup maple syrup
- 1/4 tsp vanilla
How to Make This Recipe?
Step 1: Preheat & Prep
Preheat your oven to 400 degrees. Line two baking sheets with parchment paper, because nobody wants their scones to stick. Set those aside while you start mixing!
Step 2: Mix the Dry Ingredients
In a large bowl, whisk together 4 1/4 cups of all-purpose flour, 1/2 cup plus 1 TBSP of sugar, 2 tsp of baking powder, 1/2 tsp of baking soda, and 1/2 tsp of salt. These are the foundations of your scone magic!
Step 3: Incorporate the Butter
Grab those ultra-cold butter cubes—don’t let ‘em warm up! Cut them into the flour mixture using a pastry blender or your trusty hands, just until you get a mixture that resembles coarse meal. We don’t want to over-mix, folks—it’ll ruin that flaky texture we’re aiming for.
Step 4: Combine the Wet Ingredients
Take your cooled espresso and mix it into 1 1/3 cups of buttermilk. Then, pour this dreamy concoction into the flour mixture and combine gently using a wooden spoon or your hands. You want it barely incorporated, kinda like how I barely keep track of my kid’s homework!
Step 5: Add the Chocolate
Fold in 1 cup of dark chocolate chunks—because let’s be honest, chocolate isn’t just a topping; it’s the star of the show here! If the dough seems too dry, add a splash or two more buttermilk.
Step 6: Shape the Scones
Turn the dough out onto a lightly floured surface and pat it into two 6-inch rounds. Cut each round into 6 triangles and carefully place them on your baking sheets. Brush the tops with the egg wash for that golden crust we all crave!
Step 7: Bake
Pop those scones in the oven and let them bake for about 20-25 minutes or until they’re golden brown and firm. The smell wafting through your kitchen? UNREAL.
Step 8: Make the Glaze
While they’re baking, prepare the glaze by melting 1/2 cup of unsalted butter and whisking it together with 2 cups of confectioner’s sugar, 1/2 cup of maple syrup, and 1/4 tsp of vanilla. Drizzle this goodness over your cooled scones for a little extra flair!
How to Store It & Expert Tips
How to Store It
Store your scones in the fridge for up to 3 days in an airtight container, or freeze for up to a month! To reheat, pop ‘em in the microwave for a few seconds or place them in a warm oven—because who doesn’t love a warm, fluffy scone?
Expert Tips
- Chill Your Bowls: Seriously. A cold bowl for mixing keeps everything cool and helps the butter stay solid.
- Espresso Boost: Not a coffee fan? Try using decaf espresso or replace it with a strong brewed tea for a different flavor profile!
- Flavor Variations: Add some nuts or dried fruit for a little twist; feel free to get creative!
Conclusion
These Espresso Chocolate Chunk Scones have a way of pulling everyone together—just like the warmth of home. Easy, delicious, and downright comforting, they’re a surefire hit for busy mornings or cozy afternoons. If you try these scones, drop a star rating and tell me how it went—I love hearing your stories!
And hey, share this with your cousin who never shows up empty-handed. Did you add your own spin to these? I wanna hear all about it!
FAQ Section
What can I substitute for buttermilk?
Here’s the deal: you can mix regular milk with a splash of lemon juice or vinegar. Let it sit for about 5-10 minutes, and voilà! You’ve got a quick buttermilk substitute.
Can I make these scones ahead of time?
Absolutely! You can prep the dough, shape it into rounds, and freeze before baking. When you’re ready, just pop ‘em in the oven from frozen, adding a few minutes to the bake time.
What’s the best way to enjoy these scones?
Real talk: fresh out of the oven, with a butter pat and your favorite jam or a simple drizzle of that maple glaze. You can’t go wrong!
If your sweet tooth isn’t done yet, my Chocolate Chip Banana Bread recipe is a must-try. Perfectly cozy and outstanding for that Sunday brunch!
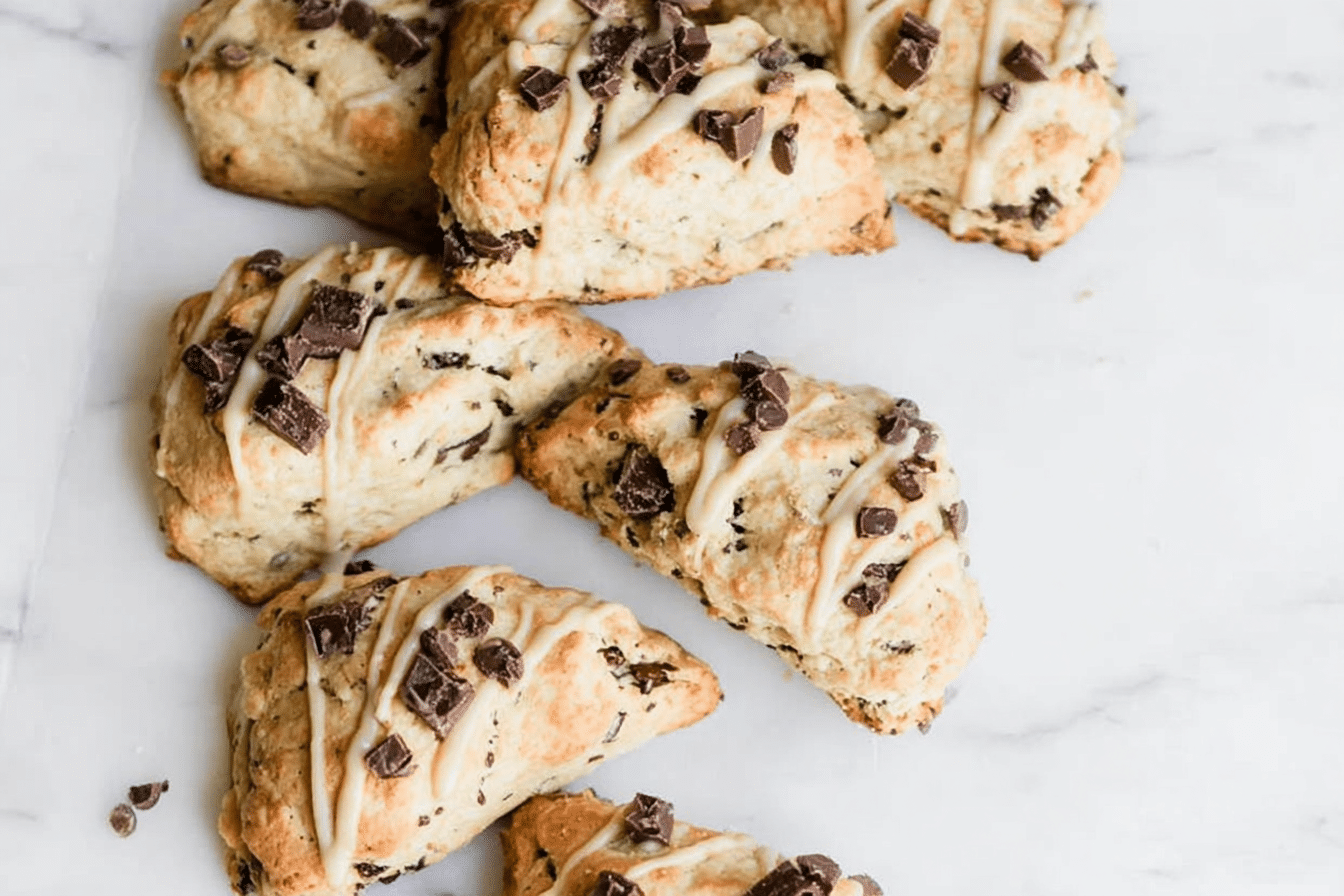
Espresso Chocolate Chunk Scones
Ingredients
Method
- Preheat your oven to 400 degrees. Line two baking sheets with parchment paper.
- In a large bowl, whisk together the flour, sugar, baking powder, baking soda, and salt.
- Cut the cold butter into the flour mixture until it resembles coarse meal.
- Mix the cooled espresso into the buttermilk and pour into the flour mixture, combining gently.
- Fold in the dark chocolate chunks. If the dough is too dry, add a splash more buttermilk.
- Turn the dough onto a floured surface, pat into two rounds, and cut each into 6 triangles. Place on the baking sheets and brush tops with egg wash.
- Bake for 20-25 minutes or until golden brown.
- Melt the butter and whisk together with confectioner’s sugar, maple syrup, and vanilla. Drizzle over cooled scones.