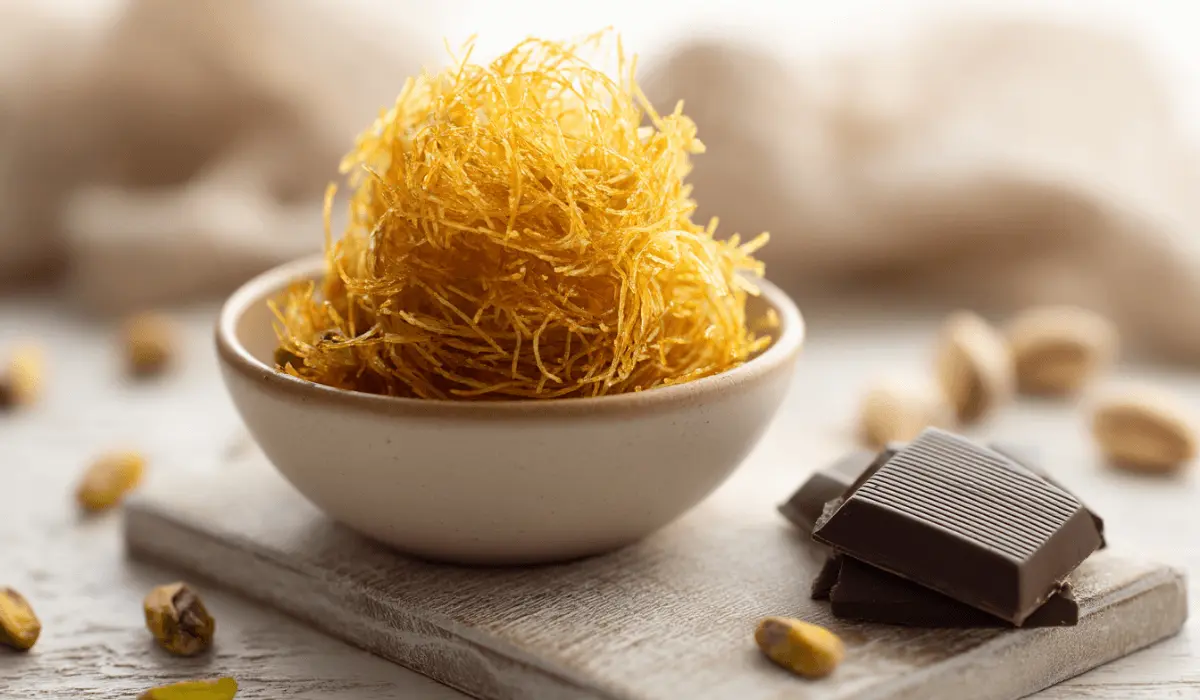
Have you seen those viral Dubai chocolate bars and wondered what that incredible crunchy stuff inside is? You’re in the right place.
It’s called kataifi. And listen, if you’ve been searching for what is kataifi, how to make it at home, or how to get that perfect golden crunch! This post is your one-stop kitchen hookup. We’re talking crispy, buttery, melt-in-your-mouth magic.
This isn’t just a deep dive into what kataifi actually is. It’s your full guide to making it from scratch with pantry basics. No mystery ingredients. No hard-to-find equipment. And yes, it’s the key to all of my best Dubai chocolate desserts. Stick around, and I’ll show you how to turn flour and cornstarch into something outrageously crunchy.
Let’s do this.
Table of Contents
So, What Is Kataifi Pastry?
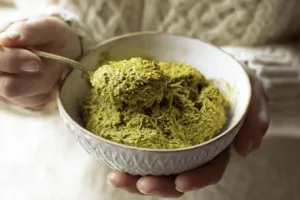
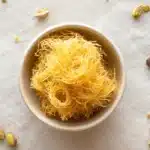
Kataifi (pronounced ka-ta-EE-fee) is a unique pastry made up of delicate, thread-like strands People call it shredded phyllo, but that’s not quite right.
Phyllo dough is rolled out into those see-through sheets you use in stuff like spanakopita or baklava. Kataifi is totally different. You start with a thin batter, then pipe it into fine strands over a hot surface. It sets fast and looks kind of like crispy noodles when it’s done.
Traditionally, it shows up in all kinds of sweets. You’ll see it wrapped around chopped nuts and drenched in syrup, or baked up as the bottom layer of kunafa with a creamy center on top. It’s been part of Middle Eastern and Mediterranean kitchens forever.
That viral chocolate crunch? Just the latest chapter.
Why You’ll LOVE Making It at Home
- It’s cheap. Store-bought kataifi can be hard to find, and when you do, it’s overpriced. This version costs next to nothing.
- You’ve got the stuff already. Flour, cornstarch, salt, water, oil. That’s it. Nothing fancy. No special trip to the store.
- You decide how it turns out. Use it soft for layering. Toast it up for that big crunch. It’s up to you.
- No fancy tools. I used an old squeeze bottle and a frying pan. That’s all you need. Once you try it, you’ll get the hang of it fast.
What You’ll Need (Ingredients & Equipment)
Ingredients
All-Purpose Flour
I use the same flour I keep in the back of the cupboard with a clothespin on the bag. You know the one. It’s what gives the strands just enough strength so they don’t fall apart in the pan. Don’t measure like it’s rocket science. A scoop’ll do.
Cornstarch
This is the one people overlook, and then wonder why their kataifi feels limp. Cornstarch keeps it light. It’s why the strands crisp up like magic in the pan. No snap, no crunch? You probably forgot this guy.
Salt
Teeny pinch. That’s all you need. Brings everything else to life. Even if you’re going sweet, trust me! Skip the salt and the whole thing tastes flat.
Neutral Oil
Whatever’s on hand. Veg, canola, sunflower… Just something that won’t mess with the flavor. This keeps your batter smooth and helps it slide out clean when you’re piping. You’ll thank yourself later.
Water
The binder. It brings everything together and lets you adjust the consistency so it pipes clean and thin.
Essential Equipment
Fine-Mesh Sieve
Use this right after you mix the batter. Even if it looks smooth, there’s always a lump hiding in there. Skip this and your squeeze bottle’s gonna jam.
Squeeze Bottle or Piping Bag
This is how you get those strands. I use a cheap plastic bottle I found at the grocery store. If you don’t have one, cut the corner off a sandwich bag and poke a hole with a toothpick. It works.
Non-Stick Pan
You need the batter to set quick and lift clean. A good non-stick makes your life easier. No sticking, no tearing. Just smooth cooking.
How to Make Kataifi Pastry from Scratch
Step 1: Mix the Batter
Bowl goes on the counter. In goes the flour, cornstarch, and salt. Stir it around with a fork or a whisk. Doesn’t matter which.
Add the water and oil. Start whisking. You want it thin, like pancake batter if you held back on the flour. If it’s too thick, add a splash of water. If it’s too lumpy, pour it through a strainer. You’ll thank yourself when it’s time to cook.
I use a mesh strainer and pour the whole thing through into a big measuring cup. It takes out the lumps so the batter comes out clean when you start piping. Skip this and your bottle’s gonna clog. Ask me how I know.
 1")
Step 2: Cook the Strands
Warm up a non-stick pan on low heat. You don’t want it too hot. Just warm enough that the batter cooks right when it hits the surface.
Fill a squeeze bottle or piping bag with the batter. Pipe it onto the pan in thin lines or small circles. The strands should look like little noodles.
Let it cook for about five to ten seconds. You’re not looking for color here. Just wait until it sets and lifts off the pan easily. Then move on to the next batch.
 2")
Step 3: Keep It Soft
Use your spatula to move the strands onto a clean towel.
Right away, cover them with another towel. This traps a little steam and keeps them soft and easy to work with later.
 3")
The Secret to the Dubai Chocolate Crunch
Once your kataifi is ready, take a small handful and pull it apart with your fingers. Just loosen it so it’s not packed together. You don’t need to shred it.
Melt some butter in a skillet over medium heat. Keep an eye on it. If it starts smoking, turn it down. You’re not looking to fry anything.
Add the kataifi and move it around so the butter coats everything. Stir gently. Let it cook for a few minutes until it turns light golden and smells toasted.
Scoop it out and lay it on a paper towel. Leave it alone for a bit. As it cools, it’ll crisp up.
Use it in chocolate molds or just eat it plain. It’s crunchy, buttery, and works in anything that needs a little texture.
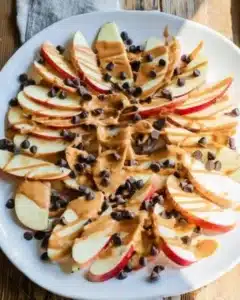
Now that you’ve mastered the perfect crunch, the next step is to pair it with my easy homemade pistachio butter, or even my silky pistachio cream to create that signature Dubai chocolate filling
 4")
Jason’s Pro-Tips for No-Fail Kataifi
Let me save you a few headaches. I’ve made every mistake you can make with this stuff.
Batter too thick? Or runny?
Too thick and it won’t come out right. I add water a spoon at a time, stir, and check the drip. Too thin and it just runs like water. That’s when I shake in a little flour and try again. You’re aiming for smooth and thin, but not watery. Like pancake batter on a lazy day.
Strands clumping together?
That pan probably needs a bit more heat. Not blasting, just hot enough so the batter cooks the second it hits. And go easy. Pipe a little, let it set, then go again. If you try to rush and crowd the pan, you’ll get a gummy mess.
My piping tip is too big. The strands look like worms.
Been there. If your squeeze bottle or piping bag hole is too wide, grab a toothpick. Poke a tiny hole in a clean plastic bag and pipe through that instead. You’ll get those perfect, hair-thin noodles without buying new gear.
How to Use Your Homemade Kataifi?
You’ve got your crispy kataifi. Now what?
You can mix it with my homemade pistachio butter, then press it into chocolate molds to get that signature crunch from the viral bars everyone’s talking about.
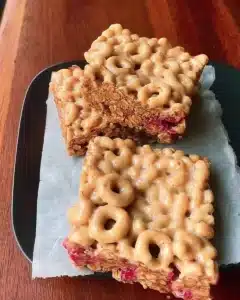
Or crumble it up and stir it into my Fudgy Dubai Chocolate Cookie dough for little pockets of texture that hit just right. Want something more classic? Spoon it over my Dubai Chocolate Cupcakes right after frosting. It sticks, adds a crunch, and honestly just looks good.
Still got some left? Save it. It stays crisp. You can layer it into syrupy traditional stuff later, or use it on ice cream.
Check out My Ultimate Guide to Dubai Chocolate Desserts if you want every single idea in one place.
Your Kataifi Questions, Answered
What is a good substitute for kataifi?
Look, nothing really does what kataifi does. It’s its own thing. But if I had to MacGyver it? Maybe shredded wheat biscuits crumbled up a bit. Some folks try rice noodles, but they don’t hold syrup the same way. It’ll get you close, but it won’t be quite right.
Is kataifi gluten-free?
Traditional kataifi isn’t. It’s made with regular wheat flour. That said, I’m testing a gluten-free version soon using rice flour and tapioca starch. Stay tuned.
Where can I buy kataifi pastry if I’m short on time?
Check the freezer section of Middle Eastern or Mediterranean grocery stores. It’s usually near the phyllo dough. Some online shops carry it too.
How do I store homemade kataifi?
If it’s still soft, wrap it tightly in plastic and keep it in the fridge for a day or two. For longer storage, freeze it in an airtight container.
If it’s toasted, let it cool completely first. Then store it in an airtight jar at room temp. It’ll stay crisp for about a week.
 5")
Homemade Kataifi (The Secret to the Dubai Chocolate Crunch!)
Ingredients
Method
- Mix the Batter: In a bowl, combine flour, cornstarch, and salt. Add water and oil, whisk until smooth. Adjust with more water or flour for a pancake-batter consistency. Strain through a fine-mesh sieve to remove lumps.
- Cook the Strands: Heat a non-stick pan over low heat. Pour batter into a squeeze bottle or piping bag and pipe thin lines into the pan. Cook 5–10 seconds until set but not browned. Remove with a spatula and transfer to a clean towel. Cover immediately with another towel to keep soft.
- Optional Toasting for Crunch: Loosen the strands with your fingers. Melt butter in a skillet over medium heat. Add kataifi and toss gently to coat. Toast until light golden and aromatic. Cool on paper towels to crisp.
Nutrition
Notes
Tried this recipe?
Let us know how it was!Let’s Swap Ideas
Tried this recipe? I’d LOVE to hear how it went! Leave a comment and a star rating below to let me know. Messed it up the first time like I did? Tell me everything! I’m always checking to see what you’re making.
Tag me on Facebook or save it for later on Pinterest so you’ve got it when the craving hits again. I’m always checking what you’re making.